Skip to content

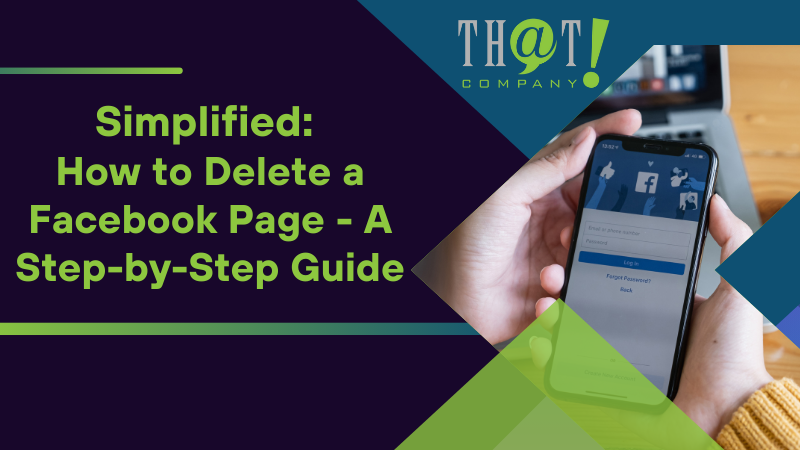
Need to delete a Facebook page quickly? This step-by-step guide on how to delete a Facebook page will show you exactly how to navigate the process, for both desktop and mobile platforms, without any hassle. Whether you’re closing a business page or just streamlining your online profiles, follow these simple instructions to delete your page in no time.
Key Takeaways
- Deleting a Facebook Business page is irreversible and should be preceded by proper preparations such as securing data, informing followers, and considering alternative options like unpublishing or merging pages.
- To delete a Facebook page, one must navigate to the page’s settings and follow specific steps for either desktop or mobile platforms, with admin status being necessary to initiate the deletion process.
- After initiating page deletion, a 14-day grace period allows for potential reversal of the decision, and for a limited 30-day period after deletion, the page can potentially be recovered by submitting a support request to Facebook.
Understanding Facebook Pages vs. Profiles
Facebook, being one of the most popular social media platforms, allows users to create two types of accounts: personal profiles and Facebook Business pages. Personal profiles are intended for individuals to connect with friends and family, while a Facebook Business page is designed for commercial use and public figures. This distinction is important to understand as the interaction varies between the two. For instance, while users ‘add as friend’ personal profiles, they ‘like’ a page to follow its updates. To make the most of your online presence, it’s crucial to have an appropriate profile picture, accurate and up-to-date facebook page information, and to optimize your facebook settings accordingly.
Business pages provide unique capabilities that personal profiles don’t. For instance, they can feature certain liked pages on their homepage, allow administrators to view the page as visitors do, and manage location check-ins. Knowing these differences will not only help you decide whether to create a Facebook profile or a page, but also guide you on how to manage them effectively.

Pre-Deletion Checklist for Your Facebook Page
There are a few preparatory steps to take before deciding to delete your Facebook page. After all, deleting a Facebook page is a significant action with lasting consequences. First, ensure your network traffic is encrypted and your data is confidential. This can be achieved through effective security measures like PureVPN, providing you with peace of mind during the deletion process.
Next, it’s advisable to download a copy of your Facebook data and history. This will allow you to retain your posts, messages, friends, and photos even after deletion. Also, notify your friends and followers about your decision to delete the page. This could be through a status update, individual messages, or the page’s marketing communications.
Finally, consider the consequences of deleting your Facebook page and make sure it’s the right decision for you. This pre-deletion checklist will secure your data, keep your followers informed, and ensure you’re confident in your decision.
Navigating to the Right Place: Accessing Page Settings
Once you’ve completed your pre-deletion checklist, the next step is to access your Facebook page settings. The settings menu is a hub of control for your Facebook page, allowing you to:
- Manage different roles and access levels for your page
- Check what role or access level an individual has on a Page
- Adjust notification settings
- Control who can view the page
- Add or edit country and age restrictions
- Link or unlink an Instagram account
Initiating the deletion process requires navigating to the correct location. Whether it’s deciding to give, edit, or remove page access for different roles, or managing business page check-ins, understanding how to access and navigate your page settings is the first step towards managing your Facebook page effectively.

The Deletion Process Step by Step
With knowledge on how to navigate your page settings, we can now proceed to the deletion process. Bear in mind that admin status is a prerequisite to delete a Facebook page. We’ll break down the deletion process for both desktop and mobile users, ensuring you can confidently navigate the process regardless of your preferred device.
Deleting on Desktop: A Detailed Walkthrough
On a desktop device, the deletion process is straightforward. Here are the steps:
- Navigate to the left menu of your Facebook feed.
- Select ‘Pages’ to view a list of your pages.
- From this list, choose the specific page you wish to delete.
Once you’ve chosen the page, follow these steps to delete it:
- Click on ‘Settings’, located at the bottom left of your dashboard.
- Proceed to the ‘General’ section.
- Find the ‘Remove Page’ option.
- Click on this option to initiate the deletion process.
Follow these steps carefully to ensure you successfully delete your Facebook page.
Removing Your Page via Mobile App
If you’re using a mobile device, the process for deletion is just as straightforward. Start by opening the Facebook app and accessing the hamburger menu. Within this menu, select ‘Pages’, then choose the specific page you wish to delete.
Next, follow these steps to delete your page:
- Tap on ‘Settings’.
- Select ‘General’.
- From there, tap on ‘Permanently delete [Page Name]’.
- This will prompt a confirmation message.
- Once you confirm, the deletion process will be initiated.
This process is similar on both iOS and Android devices, ensuring a user-friendly experience regardless of your device.

Options Before You Delete: Unpublishing or Merging Pages
Are you familiar with the alternatives before proceeding with deletion? Deleting a page is a permanent action, but Facebook offers several other options that might better suit your needs. One of these options is unpublishing your page. Unpublishing makes your page unavailable to the public, effectively hiding it without deleting it. This allows for reactivation later and can be useful if you’re updating your page, working on a new page without public viewing, or distancing the page from personal association.
Another option is merging pages. This combines followers, check-ins, and links groups from the deleted page to the remaining page. However, merging pages requires that both pages have the same name, represent the same entity, have matching addresses if they represent physical locations, and are managed under the same Business Manager account.
Keep in mind that merging pages will lead to the deletion of content such as:
- posts
- photos
- reviews
- ratings
from the merged page, and the page will be permanently removed from Facebook.
These alternatives provide flexibility, allowing you to choose the best option based on your specific needs.

Confirming Your Page Deletion: Understanding the Grace Period
On initiating the Facebook page deletion process, a 14-day grace period provided by Facebook, known as the deletion period, begins. During this period, your page remains publicly visible, giving you time to reconsider your decision. It’s a safety net provided by Facebook, ensuring that you don’t regret your decision immediately after taking action.
If you choose not to reactivate your page during this 14-day deletion period, the page and all its contents will be permanently deleted. However, if you decide to retain your page, you can cancel the deletion process during this period. This grace period offers you a chance to reflect on your decision and the ability to revert it if necessary.
Recovering a Deleted Facebook Page
After the deletion process is complete, your Facebook page is no longer available to the public, but it can still be recovered within a 30-day period. If you decide to recover your page, you must submit a support request to Facebook and follow the instructions provided in the Facebook Help Center. This recovery window offers a last chance to restore your page, in case you regret your decision or inadvertently delete your page.
Keep in mind that this recovery window follows a 14-day grace period after the deletion request has been submitted. To prevent permanent loss, action must be taken within the 30-day period if you wish to recover your Facebook page. This knowledge provides reassurance that even if a mistake happens, it can still be rectified within a certain timeframe.

That! Company – The Social Media Marketing Agency That Other Social Media Marketing Agencies Use
Now that you’re armed with the knowledge to effectively manage your Facebook page, let’s introduce you to That! Company – The Social Media Marketing Agency That Other Social Media Marketing Agencies Use. This digital marketing white label services agency offers a range of industry-leading digital marketing solutions, including:
- White Label SEO
- White Label PPC services
- White Label Social media marketing
- Reputation management
- And more
That! Company has been operating as a digital marketing agency since 2007, giving them nearly two decades of experience in the field.
In addition to their broad spectrum of services, That! Company offers:
- SEO campaign management
- Social media marketing assistance
- PPC services
- Temporary overflow services
That! Company emphasizes confidentiality and high-quality service delivery, ensuring your digital presence is safe and effective. They can fill in the gaps for agencies by expanding their service offerings and helping them sell services that they don’t provide.

Securing Your Social Media Data
Securing your social media data is a vital aspect in this digital age. That! Company is committed to ensuring your online data’s safety, providing peace of mind as you navigate your digital journey. They provide services designed to improve search rankings and amplify your digital marketing efforts while securing your online data.
Whether you’re a business owner looking to improve your digital presence or an individual wanting to safely manage your Facebook page, That! Company provides a comprehensive suite of services that cater to your needs. Their services include:
- Social media management
- Content creation
- Social media advertising
- Analytics and reporting
- Reputation management
Their commitment to confidentiality and high-quality service delivery makes them a trusted choice for securing your social media data.
Summary
In conclusion, understanding how to manage your Facebook pages and profiles is vital in today’s digital landscape. Whether you’re deleting, unpublishing, merging, or recovering your Facebook page, knowing your options and how to navigate them can make all the difference. And with experienced agencies like That! Company, you can secure your social media data while improving your online presence. Remember, your digital journey is a significant part of your life or business, and taking control of it is the first step towards success.
Frequently Asked Questions
How do I permanently delete a business page on Facebook?
To permanently delete a business page on Facebook, go to your Facebook Business Page, click on ‘Settings’ at the top of the page, go to ‘Privacy,’ click on ‘Facebook Page information,’ select ‘Delete page,’ and confirm the deletion.
How do I delete my FB page on my Iphone?
To delete your Facebook page on your iPhone, open the Facebook app, tap the three-line menu, go to “Pages You Manage,” and select the page you want to delete. (No date)
How do you deactivate a Facebook page?
To deactivate your Facebook page, click on “Settings & Privacy,” then “Settings,” and navigate to the “Deactivation and Deletion” section. Select “Deactivate Page” and follow the prompts to deactivate your page.
What’s the difference between a Facebook Page and a Profile?
A Facebook profile is for personal use and connecting with friends and family, while a Facebook page is designed for commercial use and public figures. Users ‘add as friend’ personal profiles, whereas users ‘like’ a page to follow their updates.
What happens after I delete my Facebook page?
After you delete your Facebook page, it remains publicly visible for 14 days, during which you can cancel the deletion process or recover the page within a 30-day window.