Identity Based Targeting
Google officially released Customer Match late 2015, an Identity Based Targeting option for Adwords. So why am I bringing this up to you now? Well not everybody is aware of this unique feature Google is allowing its Adwords account users to utilize in a few different ways. Customer Match gives Adwords Advertisers the ability to utilize their email databases in a few unique ways, simply by uploading your prospects email addresses. First, you would need to create email lists within your Adwords Account, then you will have the option to target, or exclude, your very own list of prospect email addresses. These email lists can be used as Audiences for Search, Gmail or YouTube campaigns as a way to customize traffic based on the users attributes.
While Customer Match is Adwords’ big step into the identity based targeting market, this step may be a little alarming to many of its users (just as Remarketing can spook users by the ads following them after they leave websites). Google maintains that they are a customer centric company and rules have been put into place to protect this notion. With that said, Google has stated that advertisers can only utilize information (email addresses in this case) that they have obtained through first party context. This would include collecting email addresses through apps, shopping carts, website forms or anywhere a potential customer has shown interest in the advertisers’ business.
If you have read down to this point and are interested in Customer Match, you may be asking yourself this question: “Does all of the emails have to Gmail only addresses since this is a Google product?” The answer is NO. Google will try to match all non-Gmail addresses as well, with a pretty high success rate to date. One stipulation that Google does require is that the email list be more than 1000 email addresses that can be matched to create a list. I created lists for a client just yesterday and had a 100% success rate on 3,500, 2,700 and 3,800 count email address lists. These lists must be in .csv format, so when you are downloading and prepping your spreadsheets for the upload process, please keep this in mind.
Enough about all of the do’s and don’ts, applications, and rules that come along with Google’s Customer Match audiences, lets’ get down to the step by step creation process and some of the details that you do not want to miss when you are creating your new Customer Match campaigns:
We are the leader in helping large and small agencies deliver Pay per click management services like Google Ads Management to their clients. Can we help you? Check out more about Our White Label PPC Services to learn more about what we can do to help your agency today.
Set up Process for Google’s Customer Match for Search:
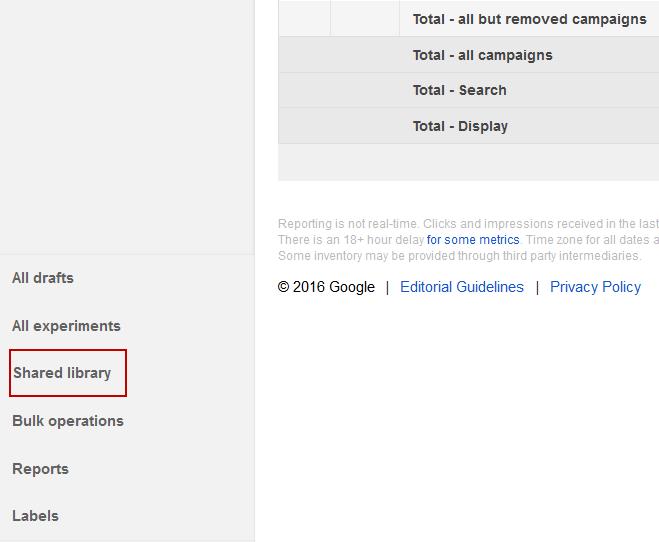
Step 1: Creating Your Email Audience in the Shared Library. Once in your Adwords Account, click on the Shared Library (located in the left navigation pane)
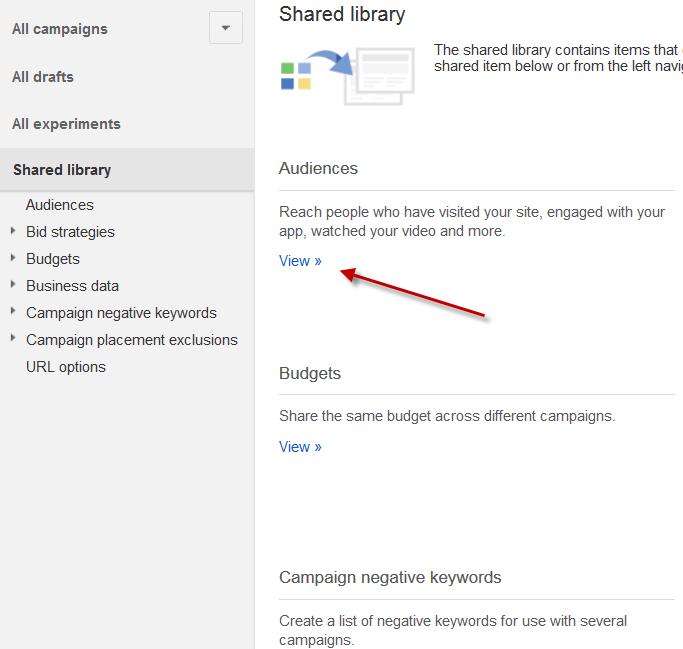
Once in the Shared Library, click on the View link under the Audiences Tab as shown in screenshot below:
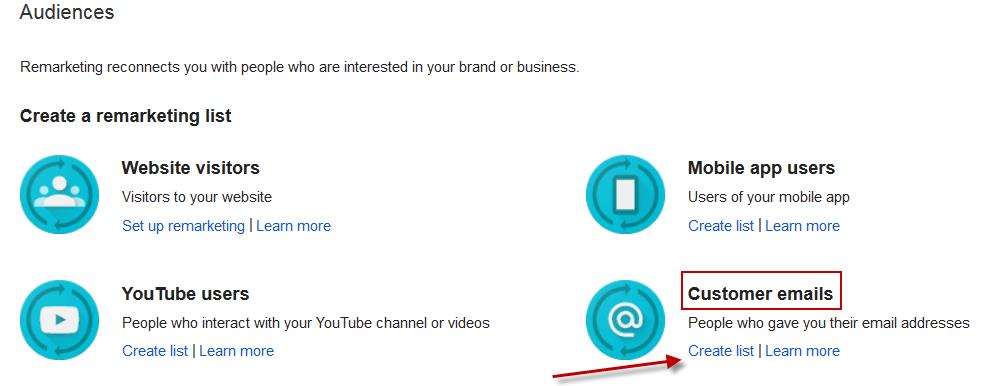
If you have never created any lists under your Shared Library, you will see the following, click on the “Create list” link under the Customer Emails Option:
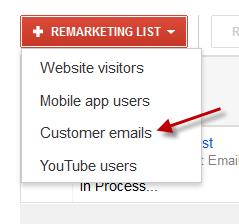
If you already have previous audiences, click on the Remarketing Button and click on the Customer Emails option:
this list includes once created if you will be using multiple lists):
Name Your List (Be specific – make sure you know what this list includes once created if you will be using multiple lists): 
Now on to the list creation. There are 2 options at the moment to create our ads, we will be utilizing the ‘Upload Customer Email Addresses’ option:

Choosing our .csv file we created with all of our email addresses (Note: these emails can be hashed using the standard SHA256 algorithm, but this is an optional step if you are interested. Details can be found here https://support.google.com/adwords/answer/6276125?hl=en ). We are simply using the standard uploading process, not hashed. Click on the Choose File box and locate the file you want to upload (file size cannot exceed 17 MB, approx. 1.4 million email addresses):

Once you select your file and it shows next to the Choose File box, you need to click on the small box stating the data was collected and being shared in accordance with Google’s policies (this will save you the trouble of not getting an error later in the process).

Last step before Uploading and Saving the List I setting the Membership Duration (2 options – you can either utilize the no expiration option or click on the expiration option and enter the time frame in days):

Or

Lastly, enter a description on what your list is about (optional):
 ;
;
You are now set to Upload and Save your Email list, click the ‘Upload and Save List’ button:

You will see a progress box appear with the progress of the upload, and once completed, you will see a box stating the success of your upload:

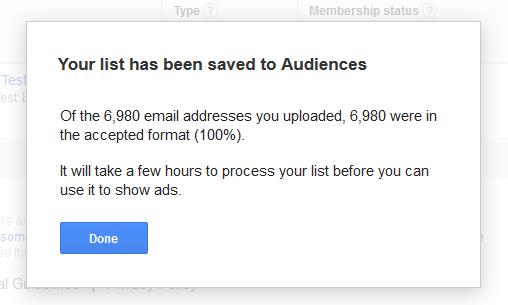
Congratulations! You have created your first list. Depending upon the size of the list, this can take up to 12 hours to completely populate for use in your new campaign.
As you can see from the screenshot below, the new Customer Match Audience has been created following the creation step by step process above. Once the Customer Match Audience has fully populated, the list will be ready for use within your account
 e next part of my 2 Part Series on Google’s Customer Match identity based targeting, I will go through the process of how to implement this into an account, and some of the options you have when utilizing your new Customer Match Audience. There are several steps in making this a successful venture, so stay tuned for Part 2 – Campaign Implementation for details on how to implement this exciting audience targeting in your account.
–Bobby Ballash, Director of Search Engine Marketing














 Talk With Us
  Give Some Love


